Pages

Monday, December 10, 2012

Banana Flambé with Grand Marnier

This is really a nice treat to have anytime of the year. At least I'll have it any season there's something so comforting about it. The kiddies wanted some ice cream so I thought mummy would make it a bit more posh. I had some bananas on hand and I figured instead of making them banana split, which they would've loved anyway why not have them try one of my favourites.


Banana Flambé


Flambé is French which means to drench in liqour and ignite. I'm not one to play with fire so I did this part outside of my kitchen with adult supervision, lol ; ) The fire burns the alcohol off but leaves a nice flavour of the liqour and gives the bananas a beautiful glaze.


For my kiddie version I left out the alcohol. I served it over vanilla ice cream with wafer thin specks of semi sweet chocolate. They loved it : )

Ingredients

3 ripe bananas sliced
2 tablespoon butter
3 tablespoon dark brown sugar
1 tablespoon Madagascar Bourbon vanilla
1/4 cup Grand Marnier
tub of vanilla ice cream

* I made a separate batch for the kiddies opting out the alcohol

Method

On a non-stick skillet on medium heat melt the butter then add the dark brown sugar. Melt together then add the sliced bananas. Gently stir the bananas so that they don't break they become really soft when cooked. Add the vanilla still a gently and for the finale... Add the Grand Marnier and ignite. Do this with caution in my case I took my skillet out to the backyard.. Better to be safe and voila! Add to your ice cream..

Enjoy, TTFN!


Sunday, November 25, 2012

Spruced Up Vanilla Cake

This recipe came from Nigella's  Christmas book. We had 2 Thanksgiving dinner to go to so I made this one for my sissy's dinner party. The bundt mould has a train that goes around the bottom of the spruce tree. It doesn't show on mine because I didn't spread the batter towards the edges. Most of it was in the middle so the cake has elevated in the center. I'm pleased with how it turned out and this is nice to pair up with white wine, coffee, tea or champagne.


Here's the photo from her cookbook..


You can't really make out the image of the train on the bottom on this one either.

Ingredients

2 sticks (16 tablespoons) soft butter, plus more for greasing or use a nonstick pan spray
1 1/2 cups sugar
6 eggs
2 1/3 cups all-purpose flour
1/2 teaspoon baking soda
1 cup plain fat free yogurt
4 teaspoons vanilla extract (I've used my fancy one for the occasion, madagascar vanilla bourbon)
1-2 tablespoons confectioner's (icing) sugar

Method

Preheat oven 350F and put a cookie sheet in at the same time. Butter or spray your large, regular or fir bundt pan thoroughly.

Either put all the ingredients except the confectioner's sugar into a processor or mix together by hand or a free standing mixer as follows:
- Cream together the butter and sugar in a large mixing bowl until light and fluffly.
- Add the eggs one at a time, whisking each one in with a tablespoon of flour.
- Fold in the rest of the flour, and add the baking soda, yogurt and vanilla extract

Pour and spoon the mixture into your greased pan and spread evenly. Place the pan on the preheated cookie sheet in the oven and bake for 45-60 minutes until well risen and golden. After 45 minutes, push a cake tester into the center of the cake. If it comes out clean the cake is cooked. Let it sit out of the oven for 15 minutes. Gently pull away the edges of the cake from the pan with your fingers, then turn out the cake, hoping for the best.

Once cool, dust with icing sugar pushed through a small tea strainer, to decorate think fresh snowfall on the alps.

TTFN : )


Wednesday, November 21, 2012

Black Forest Gâteu / Tea Time Treats Challenge

For the month of November Tea Time Treat Challenge hosted by Kate from What Kate Baked and Karen from Lavender and Lovage the theme is celebration cake to celebrate their one year Tea Time Treat birthday. One of my favourite celebration cakes are birthday cakes. I mean any cake's my favourite, but the joy I get growing up as a child and to this day of being presented with a cake and friends and family gather to sing and celebrate your birthday is one of my happiest moments.

Now that I'm learning (but rather slowly) to bake cakes, I now have kiddies to bake for and just love seeing their eyes light up on their birthdays with joy and excitement over a birthday cake that mummy had baked for them brings so much warmth and joy to my heart. Right, enough of that.

My entry this month is something I am very proud of and that I've baked for the very first time. It's a Black Forest Gâteu / Cake that I made for my daughter upon request for her 12th birthday earlier this year. She wanted her cake to look just like the cake based on a video game that her and her friends play where at the end of the game the character receives a cake. Black Forest is her favourite so I've combined the two together. Black forest cake inside and the video game design on the outside. Here's the link to this previous post Portal Black Forest Cake.

I'm entering this Cake for this months Challenge..


this is the video game cake...


Ingredients

1 (18.25-ounce) box super moist chocolate fudge cake mix, Betty Crocker
1 2/3 cups chocolate milk
1/2 cup vegetable oil
3 large eggs
5 tablespoons unsweetened cocoa powder (will need to divide 3tbs and 2tbs)
3/4 cup cherry pie filling
1 (12-ounce) container frozen nondairy whipped topping, thawed

Garnish: 2 bars of your favourite bittersweet dark chocolate (one of mine is Ghirardelli )
Maraschino cherries

Method

1. Preheat oven to 350°. Spray 2 (9-inch) cake pans with nonstick baking spray with flour.
2. In a large bowl, whisk together cake mix, chocolate milk, oil, eggs, and 3 tablespoon of cocoa until smooth. Divide batter evenly between prepared pans. Bake for 20 to 24 minutes, or until a wooden pick inserted in center comes out clean. Let cool in pans for 15 minutes. Remove from pans, and cool completely on wire racks.
3. Spread cherry pie filling between layers.
4. Add 2 tablespoon of cocoa powder to whipped cream to add a bit of brown then spread topping over top and sides of cake.
5. Blitz 2 bars of bittersweet dark chocolate in the food processor.
6. Gently press chocolate crumble onto sides of cake and top of cake. (I slapped mine on...lol) Top cake with small whipped cream circle using cake decorator tip # and cherries. Store in refrigerator.
Makes 1 (9-inch) cake

Sunday, November 11, 2012

Chicken Casserole / Random Recipe Challenge #22


For this months challenge Dom at Belleau Kitchen had us count our cookbooks to our random birthday number. What ever the number is that's the cookbook you'll cook from. My number is 16 and my count happened to land on Sally Bee once again. I haven't got quite a large selection of books as of yet so I might be going through similar books for the challenges from time to time. The best thing about Dom's challenges are the fact that I get to open my book on a random page and challenge myself to prepare dishes I haven't made before. So, the random page I ended up with was Chicken Casserole. I haven't made chicken casserole just eaten them, so this was exciting because I've always wanted to learn how. I'm sure that there are hundreds of version but for now this is Sally's version. It turned out really well, wasn't greasy at all and it felt light in the stomach and comforting for the cold weather. It was tasty and not salty. I did follow her method and had the exact ingredients, mine turned out to be more like a chicken soup rather than a casserole. I don't know what happened there. The family enjoyed it so this is worth a try..


...here's that beautiful rainbow my darling daughter took a photo of from inside our car..


Ingredients

2 tbsp plain flour
freshly ground peeper
sprinkling of dried mixed herbs
4-6 skinless chicken breast portions cut into chunks
2 tbsp extra virgin olive oil
6 rashers (slices) very lean bacon cut into cubes
225g/8oz shallots peeled and halved if large
2 garlic cloves, peeled and crushed
2 courgettes sliced
1 red and 1 green bell pepper deseeded and sliced
300ml/10fl oz/1 1/4 cups white wine (alcohol will burn off during cooking)

*if you prefer this dish without the wine add more stock or non alcoholic grapejuice.

Method

Preheat the oven to 160C/325F/Gas mark 3. Mix the plain flour with some black pepper and dried mixture herbs in a large bowl, dust the chicken breast in the flour and set aside. Reserve some flour for the sauce.

Over medium heat add the olive oil in a large lidded flameproof casserole dish. Add the chicken and bacon and fry until golden. Add the shallots and garlic and saute for 2-3 minutes until softened. Add all the remaining ingredients - the peppers, courgettes, stock and wine. Stir in the reserved flour to add thickness to the sauce. Cover and cook in the oven for about 1 1/2 hours or until chicken is nice and tender.

Serves 4


Sunday, October 28, 2012

Glazed Pecans

Pecans are such a nice addition to breads, salads, etc. I buy them at the supermarket glazed. I decided to make my own glazed pecans the other day and I added them to my salad. I just love the sweet, savoury and sharp combination in a salad. This was quite easy to make as well. I only had 1/2 a cup of pecans so my measurements are for that amount of pecans. You can double it up and garnish what ever you like or munch on it by itself. Perfect as a gift as well : )


Ingredients

1/2 cup pecans
1/2 tablespoon butter
1/2 tablespoon dark brown sugar (you can use golden brown sugar)
1/2 tablespoon maple syrup

Method

Preheat oven to 350F. Combine butter, brown sugar, maple syrup in a small saucepan over low heat. Once butter and sugar's melted add the pecans. Cook and stir for 2 minutes or until pecans are coated. Remove from heat and line baking tray with parchment paper. Transfer pecans to baking tray and cook in the oven for 7 minutes. Let stand to cool for 25 minutes. Can be stored in a tight container up to 2 weeks. When giving as a gift write the use by date. : ) Enjoy!

Monday, October 15, 2012

Lemon Polenta/Cornmeal Cake Random Recipe Challenge #21

For this months Random Recipe Challenge over at Dom's Belleau Kitchen it's store cupboard finds. We're to use or find something in our cupboard/pantry that's been neglected that should've been used or cooked ages ago. What a fun and wonderful challenge this is. What I found lurking in the back of my pantry was a package of cornmeal that I purchased a year ago because I wanted to make my first cornbread for Thanksgiving. That didn't happen I went with a store bought bread rolls instead. So the cornmeal's been sitting there for a year now and fortunately it hasn't expired.

I flipped through my cookbooks and found a nice recipe from Nigella, a Lemon Polenta Cake. You can substitute the polenta with cornmeal which is what I did, Yay!

I had a bit of trouble turning it onto the plate it broke a little....


This cake's so delicious you can have it anytime of day. We were going to have it after dinner for dessert and that didn't happen. We ate it first then dinner, lol. We drizzled lemon syrup over it which made it softer, sticky and tangy-much more lemony. The syrup was another recipe that went along with the cake.

Ingredients

For the cake

1 3/4 sticks (14 tablespoons) soft unsalted butter, plus extra for greasing
1 cup superfine sugar
2 cups almond meal/flour
3/4 cup fine polenta/cornmeal
1 1/2 teaspoons baking powder
3 eggs
zest 2 lemons (save the juice for the syrup)

For the syrup

juice 2 lemons
heaping 1 cup confectioner's sugar

1 x 9-inch springform pan

Method

Line the base of your cake tin with baking parchment and grease its sides lightly with butter. Preheat the oven to 350F.

Beat the butter and sugar till pale and whipped, either by hand in a bowl with a wooden spoon, or using a freestanding mixer. My son and I used the wooden spoon method.

Mix together the almonds, polenta and baking powder, and beat some of this into the butter-sugar mixture, followed by 1 egg, then alternate dry ingredients and eggs.

Beat in the lemon zest and pour, spoon or scrape the mixture into your prepared tin and bake in the oven for about 40 minutes. It may seem wibbly but, if the cake is cooked, a cake tester should come out cleanish and, most significantly, the edges of the cake will have begun to shrink away from the sides of the tin. remove from the oven to a wire cooling rack, but leave in its tin.

Make the syrup by boiling together the lemon juice and icing sugar in a small saucepan. Once the icing sugar’s dissolved into the juice, you’re done. Prick the top of the cake all over with a cake tester (a skewer would be too destructive), pour the warm syrup over the cake, and leave to cool before taking it out of its tin.


October Final Round Up


Wednesday, September 26, 2012

Spaghetti Pasta With Zucchini, Cherry Tomatoes, Feta and Parmesan Cheese

While a lot of places are beginning to feel the Autumn season sorting out their closest for their cozy sweaters, scarves and boots, It's still summer here. I can't wait for it to start getting cooler. That's when I love being outdoors with my babies going for a walk. People are still wearing their tank tops and shorts around here and there's no sign of cooler weather anytime soon.

Last night I put together something very quick and summery for dinner with the help of my sweet boy of course. I don't know what I'll do without him when he starts going to school. Anyway, this recipe is pretty much one of those "Add as much as you want or need" so there's no fuss and measurements.

Since I started learning how to cook, bake, read more and more cookbooks, learning more about ingredients such as herbs, spices, oils, and vinegars. I am now even more excited about cooking, baking and experimenting. My son shaved the parmesan cheese it looks like he really enjoyed it : ) There was so much of it on the plate...lol.


Kiddies and I took this photo while we went out for a quick walk after dinner and saw this cloud over at the other neighbourhood. It was about 7pm and it wasn't quite dark yet. It looks much more amazing seeing it in person.


Ingredients

1/2 a box of spaghetti
salt
4 zucchinis/corguettes
some cherry tomatoes
lemen
olive oil
2 cloves of garlic
feta cheese
fresh parmesan cheese

Method

Place the spaghetti in a large pot of boiling water add some salt to the water, cook time suggested on the box. While the pasta's boiling crush the garlic with the flat side of the knife and slice the zucchinis. Sauté the garlic and zucchinis in a pan with olive oil on medium low heat until the zucchinis are soft and translucent. Drain the pasta and keep a 1 cup of water from pot it was cooked in. Keep the water if the pasta gets a little dry add a tad bit. Mix the pasta, zucchinis, cherry tomatoes, drizzle of olive oil, squeeze a wedge of lemon or as much as you want in a large bowl. Top it off with feta and shredded parmesan cheese....Yummm


TTFN!


Monday, September 10, 2012

Oven Baked Banana Boat

There hasn't been much cooking in the kitchen lately. Cold and Allergies have arrived and I've been taking care of the family so in other word I haven't had much rest. Been up most of the night with very little sleep and up very early to get daughter off to school. Mummy's don't get to rest...

Anyway, I've made this with the kiddies 2 months ago and didn't get to post it. They wanted to roast some smores. We had the chocolates and the marshmallows except for the graham crackers. What we did have was some bananas. I remember watching pioneer woman's episode when they made a banana boat while camping so we did that instead. It's really quite easy....


This is my sweet boy's boat. After I've finished slicing the banana through the center not going all the way through, he stuffed it with dark chocolate morsels and marshmallows.


This one's his sissy's, you basically add how much you want really or whatever you like in it. Like peanut butter, peppermint, caramel and so on.


Wrap them in aluminum foil and bake at 350F for about 10 minutes. Get your spoon ready and enjoy! I don't have a photo after it was baked kiddos were too excited to eat them! : )

Wednesday, August 29, 2012

Random Recipe Challenge / Orange And Peach Filo Parcels

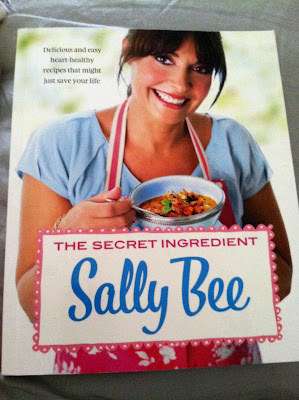
Hello! Hello! It's been quite busy here at home for me. I'm glad to be able to participate with this month's challenge. Dom from Belleau Kitchen have got us going again with Random Recipe Challenge that he hosts every month. We are to choose a random cookbook and open a random page and create the recipe. I gave my sweet boy the honour of choosing the book since he's not able to read as of yet. The cookbook he pulled out from our mini library is The Secret Ingredient by Sally Bee.

Sally Bee is a mother of 3 children, a wife, a writer and a TV presenter. At 36 years of age she suffered 3 massive heart attacks all within a weeks time. She lives a healthy lifestyle and has no history of heart disease and neither does the rest of her family. So, it was a surprise to her, her family, and doctors when it happened. Her story has touched me in a very personal way. I felt how she was feeling when she was telling  her story and while she was slipping away at the hospital, except it wasn't my heart It was my lungs. She is a living miracle as there is no cure for what she has. She tries to live a full life and be as healthy as she possibly can be. This was the cookbook I mentioned in my previous post that I found on the clearance table. I would've gladly paid retail for it. It's full of healthy recipes that she prepares for herself and family. My sweet boy opened the book to a random page. The kiddies eyes grew with delight when the page opened and they saw a photo of an Orange and Peach Filo Parcels. They were quite excited that we took our book with us to the supermarket and got all of our ingredients.

This recipe is quite easy but I've never worked with filo pastry before. I started out calm and collected then when it came to the part I had to separate the filo's to brush some oil on them, it kept breaking to pieces. The first filo I didn't mind breaking since I was learning how to handle them. Then the second one broke as well, I was still alright thinking to myself I'll get the third one right. They crumbled again!! It was 6 filo pastry I've broken! My face started to change and my forehead began to develop lines which looked like I'm in need of botox! I was having a kitchen nightmare with such a simple recipe. Don't get me wrong its not her recipe its me and my war with the filo pastry! "Oh its on baby!" The hubs wondered what the heck was going on in the kitchen! I had to ask my sweet boy/sous chef that mummy had to do this one alone for the sake of all the filo's I'm about to wrestle with. Didn't want him to see me sweating over thin little papers... lol. Finally!! The seventh filo didn't break I was very careful with them until I had to put them in the ramekins! They started cracking again! I could not get it nice and pretty as her photo and how she suggested to place them in the ramekins and twist the top of the filo so that it wraps the filling inside. I started pushing them in the ramekins and wrapping it like a burrito as they kept breaking and drying.

This was a definite Recipe Challenge for me....I tried to keep the filo's from drying by rolling the plastic back on the and covering it with a cloth but I'm guessing its the hot temperature and zero humidity we have here. I don't know it's my first filo experience. At the end of it all we had a delicious treat to eat and everyone was happy : )


This is what it looked like taken out of the ramekin. It's meant to look like a parcel with the top looking like a Victorian ladies draw string purse. Not even close...I shall keep trying and master how to work with a filo dough.


She's inspired me to live a full and healthier life for myself and my family and I shall try to cook a much healthier meals for us.

Ingredients

3 oranges
3 peaches and nectarines
2 tbsp maple syrup
50ml/2fl oz/1/4 cup water
1 tbsp light olive oil
12 sheets filo pastry, each cut 18cm/7in squares
icing (confectioners) sugar to dust
6 x 9cm 3 1/2 in diameter ramekin dishes (I've used the only kind I got, not sure what size it is)

Makes 6 Parcels

Method

1. Preheat the oven to 200C/400F/Gas mark 6.

2. Using a small knife, remove the peel and pith from the orange and cut in between each segment.

3. Wash and slice the peaches into small pieces as the orange segments.

4. Put the fruit, maple syrup and water into a large pan and simmer over a medium heat for 3 minutes.      Remove from heat and strain over a jug, saving the juices for later. Lightly oil the ramekins.

5. Brush one of the filo squares with a little oil then lay another square on top and brush again. Turn over so that the greased side is facing down then gently push the double filo squares into the ramekins,

6. Repeat with the remaining pastry to line the remaining ramekins.

7. Divide the fruit among the ramekins. Gather up the filo edges and twist together lightly seal. Transfer ramekins to a non-stick baking sheet and bake for 25-30 minutes, or until crisp and golden.

8. While your parcels are cooking pour the juices into a small saucepan and simmer until reduced by half.

9. When the parcels are cooked, remove from the ramekins and put onto plates. Dust with icing sugar and serve with the reduced juice poured over.

Enjoy!!!


Wednesday, August 1, 2012

A Year Of Blogging


It's been a year since I started my blog. Well a year and one month today to be exact. I'm a month behind on posting. When I first started I really didn't know much about blogging. I moved to another state that was unfamiliar to me. I didn't have any family at all or friends. I had to start my life all over again with my 5yr old at the time. The hubs family lives here and they've been kind to me. I didn't have my mum, gran (Lola), brother, and sisters here. I was living in the middle of nowhere. There were times I felt very alone and I would find myself crying at times. I think that's a natural feeling for anyone isn't it?

When I lost my gran I was heartbroken. I was having a hard time healing. I started taking courses in Cake Decorating which I found quite therapeutic. I learned about blogging when a girl from class said she had one. I was missing loads of food I used to eat particularly the one's that Lola used to make. I started teaching myself how to cook home made meals. 

One day decided I would go for it. I would start my own blog I began visiting other blogs and saw amazing dishes, beautiful sites and photos. I started taking photos of what I was cooking and baking to keep records of what I have accomplished as a new home cook. I didn't have a proper camera so I've used my mobile phone. I discovered that I had a passion for cooking, baking, and collecting cookbooks. I found joy creating meals for the family. My kiddies are my biggest fans and sous chefs.

I started meeting blogger friends online who all have the same passion for food, creating them as well as eating them. I found myself drooling over everyone's dishes and being inspired by it all. I'm very thankful for the few who had been with me since the beginning of my journey as a blogger. They have often left me kind comments and to be honest their comments has helped my mending process and lifted my spirits. 

It's been a fantastic experience and I'm learning from each and everyone of you. I'm thankful for everyone who's joined my journey and the new one's that have just now stumbled upon my blog. I've learned that "Food does feed the soul."

TTFN : )


Wednesday, June 20, 2012

Course 4 Advanced Gum Paste Flowers

I've been quite busy with classes and kiddies for awhile that I haven't had the chance to post anything. Well, I'm finished with my Advanced Gum Paste Flowers course and I received my certificate. Wooo Hoooo!!! : ) This is what we learned in class...

We learned how to create different sorts of flowers, flower buds and leaves. We learned the different sizes of wire gauges and how to wrap the wires with florist tapes. We learned how to paint the flowers as well. I need more practice to get the flowers just right.


Ivy leaves....


Lily leaves....


Gerbera Daisy... She loves me, she loves me not, she loves me, she loves me not....


No worries my sweet boy, mummy's got another one.. : )


She loves me!!! : )


Briar Rose...


Stephanotis... I chipped it on the way home and didn't get to put the stamen in.


Sweet Pea... It kinda got flattened.


Blossoms...


Stargaze Lily..


Flower Bouquet... I haven't attached the leaves just yet.


Oh, and this is my work area. I like took over 2 and a half tables. It's alright though there were plenty of space the tables were small. It worked out for everyone though we all took over 2. : )


Wednesday, June 6, 2012

Giant Chewy Chocolate Chip Cookies

The other day my daughter wanted some chocolate chip cookies. We didn't have any in our pantry so she decided she was going to bake a batch. This was her first time making one from scratch so she searched for the recipe. Fortunately, we had most of the ingredients we needed then come to fine out we were out of unsalted butter. I dreaded going to the supermarket as it was 111 degrees farenheit here (that's 111 ºF = 43.8888 ºC).

My daughter showed so much interest and excitement on how she was going to bake us a treat all on her own that I couldn't not go to the market. I loaded the kiddies in the hot oven temperature car with the AC on full blast and off we went. When we got to the supermarket, there in the entryway as the automatic doors slid open were pre baked and packed in a clear plastic box was some..........chocolate chip cookies! The whole point of not leaving the cool air conditioned house was she was going to make her cookies from scratch. We could've easily had purchased these grocery store cookies. But, there is nothing like homemade cookies.

I couldn't do that, my sweet girl wanted to bake us her very own. So we walked right passed the cookies and went straight to the butter fridge, purchased it and went straight home. We had to rush back since it was sooooooo haaaaawwt!.....the butter was beginning to melt! Ahhhh!! : )

My baby girl, well she's not a baby anymore but she's still is to me : ) gathered all her equipment, bowls and ingredients and all I see in the kitchen were fog of flour in the air lol! I stayed out of her way and relaxed in the living room while I watched Nigel Slater's Toast.

Once the cookies were put in the hot oven, the aroma of baked chocolate chip cookies started to linger around the house. Yummmmmm....Both kiddies especially my sweet 3 year old boy was waiting for the oven timer to beep as he was quite excited watching the cookies rise and bake.

Beep....Beep...Beep....Beep! "Sissy! It's done! It's done!" He was very excited indeed! : ) I took the trays out of the oven for her and we waited until it cooled.

We had our first bite..........it was very good all except and we all agreed it was way too sweet. We love our desserts and we do have a sweet tooth but one's that are not too sweet. So my clever girl decided she was going to make another batch and adjust all of the ingredients.

My sweet boy once again waited by the oven window watching the cookies bake with anticipation. : )
Beep....Beep....Beep....Beep! "Sissy! It's done again! Sissy! It's done!". I took the tray out of the oven and we couldn't wait to try this batch. We waited about 1 minute to cool it said let cool for 10 minutes LOL!

This one was perfect!!! Not too sweet at all, it was heavenly, scrumptious and of course the morsels had to be a good quality dark chocolate! We paired this treat with a nice glass of iced milk since the weather was too hot!

Well done my sweet girl! Well done!


Yummmmmy......These cookies are enormous!


Drool.......look at all the yummy dark chocolate morsels.


Here is her recipe version : ) She thought that they weren't baked enough so she let it bake for 24 minutes because they were so massive.

Ingredients

2 cups all-purpose flour
1/2 teaspoon baking soda
1/2 teaspoon salt
3/4 cup unsalted butter, melted
1/2 cup packed brown sugar
1/4 cup white sugar
1 tablespoon vanilla extract
1 egg
1 egg yolk
1 cups semisweet chocolate chips

Method

Preheat the oven to 325 degrees F (165 degrees C). Grease cookie sheets or line with parchment paper.  
 Sift together the flour, baking soda and salt; set aside. 
In a medium bowl, cream together the melted butter, brown sugar and white sugar until well blended. Beat in the vanilla, egg, and egg yolk until light and creamy. 
Mix in the sifted ingredients until just blended. Stir in the chocolate chips by hand using a wooden spoon. Drop cookie dough 1/4 cup at a time onto the prepared cookie sheets (She used a massive ice cream scooper looked like about half a cup) 
Cookies should be about 3 inches apart.

 Bake for 15 to 17 minutes in the preheated oven, or until the edges are lightly toasted. Cool on baking sheets for a few minutes before transferring to wire racks to cool completely.

Wednesday, May 30, 2012

Herb and Lemon Roasted Chicken Breast

I've been meaning to post this for quite some time now but didn't get around to it. I found this recipe from another blog The English Kitchen. We love our white chicken meat here as long as the skin is off. That's how 2 of the family member prefers it. However with her original recipe she kept the skin on. Hers looks absolutely delicious!

I love finding different recipes for chicken and when I found this one I had to give it a go.


For our side we had it with mash and the The English Kitchen had hers with roasted potatoes I believe...

Ingredients

4 chicken breasts skin off
2 fluid ounces of extra virgin olive oil
the finely grated zest of two unwaxed lemons (cut the remainder of the lemons into thin slices and set aside)
4 cloves garlic, peeled and minced
4 sprigs of fresh thyme
2 fresh rosemary sprigs
4 tbs finely chopped fresh chives
4 tbs finely chopped fresh flat leaf parsley
4 tbs finely chopped fresh tarragon
sea salt and freshly ground black pepper


Method

Mix together the olive oil, lemon zest and minced garlic. Remove the leaves from the thyme and rosemary and mince. Stir them into the olive oil along with the chives, parsley and tarragon. Mix all very well together. Rub the herb all over the chicken and lay each breast in a flat plastic container, placing each one on top of two lemon slices. Lay another two lemon slices on top of each breast. Cover and chill for about an hour.

Preheat the oven to 200*C/400*F/ gas mark 5. Place the chicken breasts into the baking dish, keeping the lemon slices on the bottom of each breast and the slices on top of each breast. Sprinkle with some sea salt and freshly ground black pepper.

Roast in the heated oven for about 25 to 30 minutes, or until the chicken breasts are cooked through, with the juices running clear and the skin is golden brown. Remove from the oven and allow to rest for about 5 minutes before serving.

Monday, May 28, 2012

Pulled Pork And Strawberry Shortcake

Summer's definitely here! It's been very hot here lately so I've been taking the kiddies out to the pool. Yesterday was family day so I've planned what we were going to do and that's to go out to the pool and swim. Do you ever find yourself quite hungry after swimming? We do.

This time I was prepared I decided to make Honey BBQ Flavour Pulled Pork. I went to the supermarket and purchased all of my ingredients and got everything in the oven before we went swimming. This roast was cooked in the oven for 6 hours and oh my gosh! The meat just fell apart after it was cooked and it melted in your mouth like butter.


This is an 8 lbs. roast that was cooked in a Dutch oven with Honey Barbeque Sauce. We took it out the dutch oven, placed it in a shallow bowl and pulled it apart with forks. It wasn't much work since it fell apart so easily.


After I've skimmed the fat off its juice and BBQ sauce we placed the roast back in its sauce to absorb more of the flavour.


For our sides we baked a Southwestern Potato Au Gratin from a carton and some Garlic and Herb mash. I couldn't be bothered to make it from scratch instead it was semi homemade and it was really good!


Supper!!! Yummmmmmmm..........


A meal is not complete without dessert. The kiddies and I assembled our own Strawberry Shortcake and the dark chocolate drizzle was a must!!

Today, were doing and eating the exact same thing again....: )

Ingredients for our version of Strawberry Shortcake..


Ingredients

8 lb. Roast Pork
2 onions
Honey BBQ sauce
2 cloves garlic (I forgot to add)

Method

Preheat oven to 300F.
Place quartered onions on the bottom of  Dutch oven.
Place the meat on top of the onions and drizzle with BBQ sauce all over.
Cover with lid and put it in the oven and cook for 6 hours.